April 28, 2011

Repointing (is annoying!!)

It's the last day of a short (3 day) week here in London because of the Royal Wedding tomorrow and the bank holiday on Monday. As a result I decided to to do the re-pointing of the brickwork along our party wall, figuring it would be a simple, one-day job, and necessary to do before moving forward with the flashing (see next post).

Re-pointing is when you remove some of the old (often cracked) mortar between bricks and then put new mortar back. The first step is to remove the old mortar - this is usually done with a small angle grinder that cuts out the old mortar. Once that's done, the open joints are cleaned, the bricks are moistened, and the new mortar is put into the joints. Once the mortar has dried a bit, it can be finished in a number of different styles.

The brick wall
The old, deteriorated and missing mortar joints
This all sounds fairly straight forward (to me at least), but it's a tedious, time consuming and messy job. As i was researching online the correct way to do this, I came across a web page where the guy said something along the lines of: "I find re-pointing meditative, but it's not for everyone. If you don't find it meditative, then it's probably best you don't do it yourself." Turns out he was right...I definitely did not find it meditative!

The cleaned and cut-out joints (after using the grinder)
Cutting the mortar is messy and you end up completely covered in dust. As if that was not enough, pointing the bricks with new mortar is much harder than it looks. One is actually not supposed to get it onto the face of the brick as it may stain...but as you can see that's exactly what I did!

The new mortar in the upper joints, old mortar below
Cut & cleaned out joints
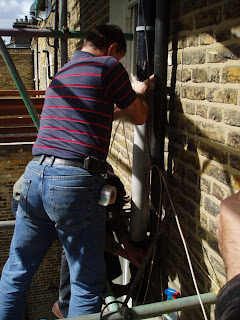
Yours truly placing mortar in the joints
The finished joints
Perhaps today I did not have my usual patience, or felt rushed to get it done, but regardless, I learned that re-pointing is just not something I'm good at, or enjoy doing. Fortunately it's a small wall and I did not have to do too much, but it still took all day...

The completed wall

April 27, 2011

Batten Down the Hatches

I'm back in London after being in NYC for almost 2 weeks - it's now time to try and finish the roof. As mentioned in the previous post, the goal of my 2.5 weeks here will be to finish the roof and try to get all the other things done that need the scaffolding in place so we can take the scaffolding down. It's a lot to do in 12 working days, but let's see what happens...

So as part of the push to get the roof done, the first big thing that needs to happen is to place all the battens on the last roof slope which faces the street.

April 25th - the remaining roof slope
As you may recall, the battens are what the slates are nailed to, and they are screwed into the vertical battens, known as counter battens. These counter battens are nailed directly into the rafters so they provide significant support. The first step in installing rafters is to set a string line - it's critical to establish a straight line so all the battens are straight and parallel, otherwise all the slates will go wonky and they won't line-up - need to avoid that!

April 25th - Setting the string line
The first two battens set with string lines
Once the first few rows of battens are set, straight and parellel, it becomes a much simpler (yet time consuming) process to installing the remaining battens...
First four rows - now ready to move faster on the rest
April 26th - Making sure both sides of the corner align

Starting to move quickly up the roof
Halfway up!
April 27 - Continuing up the roof
Last few rows - have barely enough battens to finish
Looking west - All battens installed
All battens installed
Looking east - towards the neighboring building
So it ended up taking about 2.5 days to put up all the battens and to do a few other things, but overall this took much longer than i had anticipated,...hopefully the slates will go faster...
End of the day - all battens completed!

April 25, 2011

Alternative Uses for Scaffolding

It's Easter Monday, and a Bank Holiday. That means we can't do any work, so we decided to enjoy the time off - and the fabulous weather!! - with an evening drink. Our terrace is still being used as a dumping ground, though...


...So we decided to put the scaffolding to good, if somewhat unconventional, use! :)

April 21, 2011

Roof vs. Plumbing

We have a big decision to make this week: should we finish the roof so we can take the scaffolding down - or continue with the plumbing work so we can have hot water and a working shower?

It's a tough choice - quality of life vs. saving money (we are renting the scaffolding by the week). Because of the cash flow situation right now, we can only do one at a time - not both at the same time. Here are the issues:
  • It turns out the plumbing will actually cost almost 3x more than finishing the roof - after a long discussion, we think it makes more sense to finish what we can afford at the moment, rather than do only part of the plumbing - one point for the roof. 
  • If we can finish the roof, then every week we'll have more money to apply towards the plumbing by saving on the scaffolding - another point to the roof. 
  • The breathable membrane (that has been keeping the roof watertight without the slates) is rated for up to 4 months of exposure to the UV rays in the sun. It's almost exactly 3 months today, so we should really get them covered within the next month. Another point to the roof.
  • If we finish the plumbing we can take a hot shower in the flat - one point to the plumbing. 
So with a score of 3 to 1...the roof wins!

Looks like when I return to London on Saturday, I'll be spending the next 2.5 weeks on the roof finishing it with the goal of getting the scaffolding down before I head back to New York...

April 13, 2011

Downwards and Deflated!

It's a conspiracy ! I swear, every time André goes back to New York, there's a minor drama here. Today, he actually caused the drama, sadly. The plumbers were supposed to install the toilet on Monday, but they didn't start the work until Tuesday--so there was a de facto deadline to finish at 3pm, which is when André had to leave for the airport to catch his flight.

The whole toilet installation was massively disruptive--we had to take EVERYTHING out of "The Box" so that the floorboards could be pulled up. This included our precious air mattress, which we hoisted up the ladder for safe keeping in the loft space.

However, by the time the plumbers had finished André was (surprise, surprise) running late and in a huge hurry... and in his haste to get the mattress back down, he accidentally snagged it on a protruding screw, and punctured it. :(

André gave me instructions about finding and using the air mattress repair kit, but I got home after a quick post-work drink to discover that the sole light in the living room had burned out as well ! There was no way I was going to climb the ladder to retrieve the repair kit in the dark, so what followed was one rather uncomfortable night sleeping on a deflated air mattress sitting atop our bedroom "floor" (plywood boards).

April 12, 2011

Onwards and Upwards

After getting past the dreaded corner, it was time to push onwards and upwards with the slates:

April 09th
April 09th
April 11th
April 11th
April 12th
This last image is how the roof will stay for the next two 2 weeks as it was shot just before a mad dash to the airport to head back to NYC.

Installing a Loo (a.k.a. toilet)

After several months of using the grotty old loo, we're finally replacing it! All the parts (pipes, valves, cistern, etc) were delivered over the last few days and the plumbers came today to install it.

The parts: the black "soil" pipes, elbows and connectors

The new loo - before installation

Our plumber soldering the water pipes

Placing the water cistern into the wall (it will be hidden eventually)

Setting up the cistern
Setting the exterior vent pipe

The finished loo (the walls and tiles will be added later)
It may not seem like a big deal, but getting to this point is a big step for us as starting the plumbing is the beginning of the last phase of construction...so we're very excited!

April 8, 2011

Slating a Corner

Before moving on with the upper half of this roof slope, I realized (unfortunately) it was time to tackle the dreaded corner which i was hoping to avoid...for at least a little while. I knew the corner would be tedious and would take a long time as each slate along the edge has to be cut...

The dreaded corner....
Measuring out the tile locations
The unfinished eave course at the corner (1st course)
The completed eave course
The completed 1st course (covering eave course)

The completed 1st course (covering eave course)
Several courses up
Time to call it a day...

April 5, 2011

Trial walls!

Today André took a break from roofing to begin framing out the walls that will eventually enclose the bathroom. It has to be done before the plumber can come and sort out the plumbing, but in effect it’s like having trial walls! André actually asked me whether I thought the bathroom felt large enough--if we thought we needed more space, we could “move the wall” ! I actually think it’s just fine as it is, but how amazing to get to try it on for size, so to speak.


Before - In the morning before the walls went up
After - the temporary walls